
AWS SageMaker Autopilot Enters a Kaggle Competition
Posted on February 7, 2023 • 5 minutes • 985 words
Table of contents
Kaggle
For those that have not heard of Kaggle, it’s an online community for Machine Learning enthusiasts. They run Machine Learning competitions, from beginner educational ones to large company sponsored ones with cash prizes. The premise is to build Machine Learning models as part of friendly competitions to get better and learn from each other.
The Problem
For this example I am going to use is House Prices - Advanced Regression Techniques .
This is an educational competition to take the given data set and try to work out the sales prices of houses based on 79 different variables - they then evaluate based on the RMSE between the logarithm of the predicted value and the logarithm of the observed sales price - this ultimately gives a number that is used to drive how well it did.
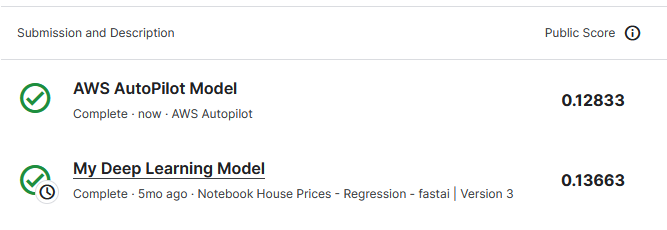
The best I have done on this competition is 0.13663, where lower is better, this is using Deep Learning with little data engineering. I have not revisited this competition since I got more into Machine Learning, therefore now I would definitively spend more time on techniques like PCA and feature engineering in general before trying to predict anything. XGBoost would probably do better as well.
Amazon SageMaker Autopilot
Autopilot is a feature built into SageMaker that will take in the input data and what the target column is, and then automatically find the best model.
This seems the perfect fit for giving it the Kaggle dataset and seeing how it compares.
Getting Started
First you need to create a SageMaker Domain for Studio to use. This itself is free, as you are only charged for the resources used.
In this example I performed a ‘Quick setup’:
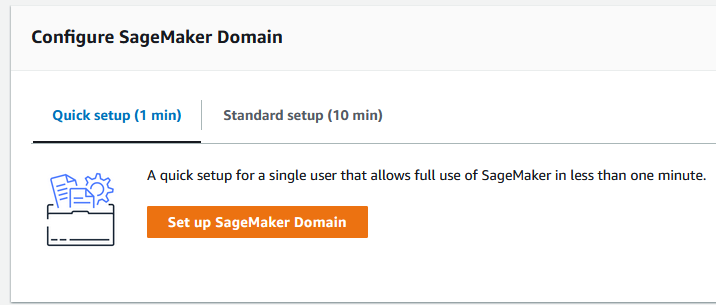
All the Quick Setup needs is a Name and a Execution role - which it will create for you if you need one. It takes a few minutes to create the domain, but then you can choose the user-profile you created in the Domain and click ‘Open Studio’.
In Studio then you need to choose AutoML on the left to open Autopilot:
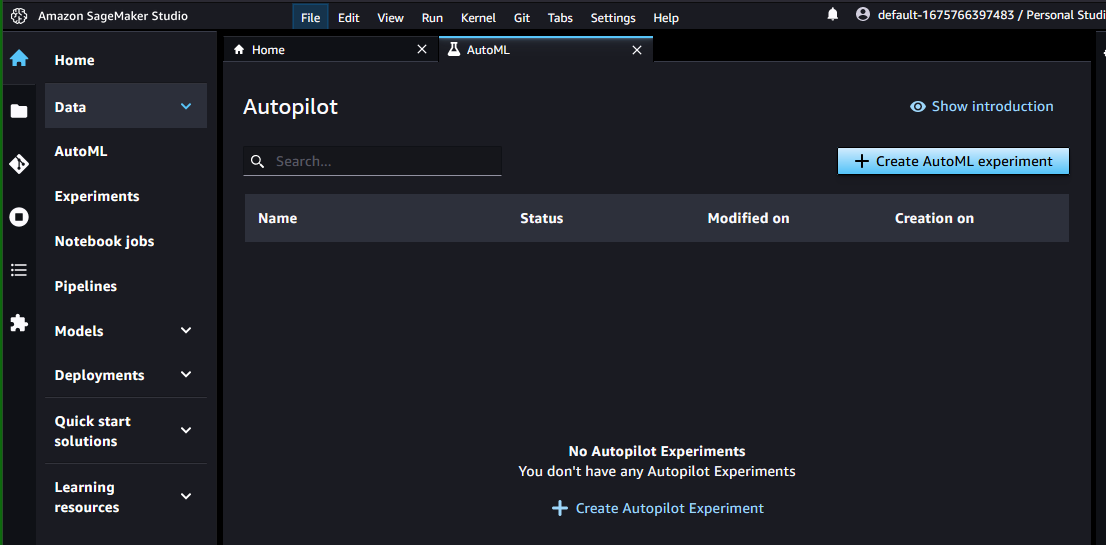
Clicking ‘Create AutoML experiment’ then starts the wizard. In the next screen a name needs to be entered so I went for ‘houseprices’. The input data then needs selecting from S3, so browse to S3 and choose an existing bucket, or create one but ensure the name has ‘sagemaker’ in it.
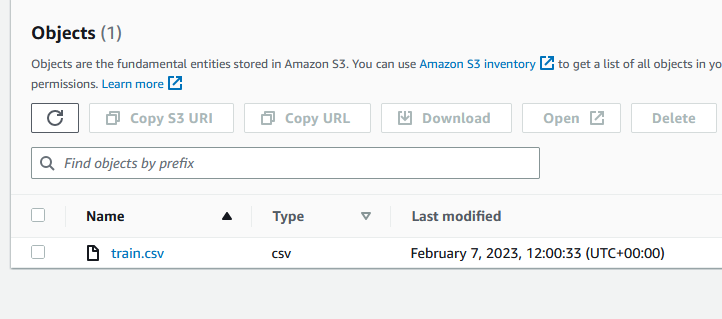
The dataset needed is the dataset that will be used for training, in Kaggle this can be downloaded as the train.csv file and then uploaded to the bucket:
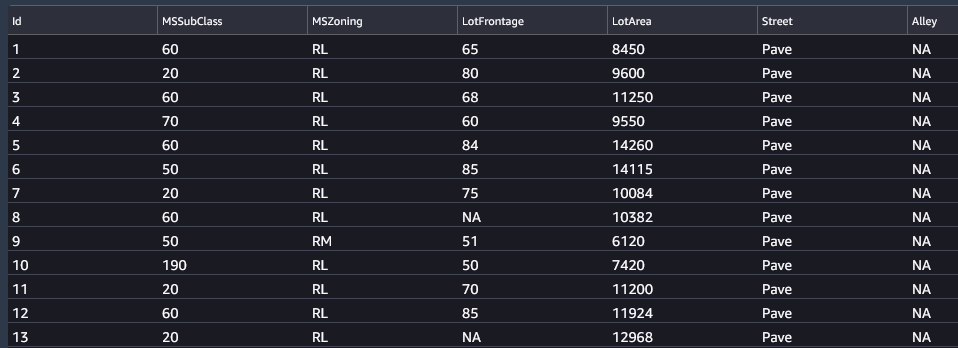
You can then select that file and choose ‘Copy S3 URI’ to get the URL for Autopilot. Paste this in the ‘S3 location’ box and click ‘Preview’ to check the data:
The next option is to ‘Auto split data?’ which should be selected, as this will mean it splits the data into 80% for training and 20% for validation - an important Machine Learning principal that means 20% of the data is held back for verifying the training model to save it overfitting.
The final option in this step is to ‘Auto create output data location’ which I left as selected Yes before clicking ‘Next: Target and features’ to move on.
Target and features
The first option in this step is to choose what feature is being predicted, here we want to predict house price so we need to select ‘SalePrice’:

For this experiment I’ll leave all the features as selected and as Auto Data type, before progressing to ‘Next: Training method’.
Training Method
Here there are three options of Auto, Ensembling and Hyperparameter optimization, but I will select ‘Auto’ for this experiment to keep it as basic as possible - but ultimately AWS will choose ‘Ensembling’ if the dataset is less than 100MB.
Deployment and advanced settings
For deployment I will set Auto deploy to No, as I will be doing a single batch inference at the end only. If I wanted this deployed to an endpoint for usage then I would select yes here.
Review and create
Double check the values and then click ‘Create experiment’ and then wait.
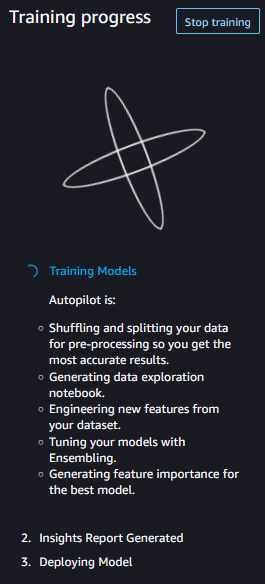
Results
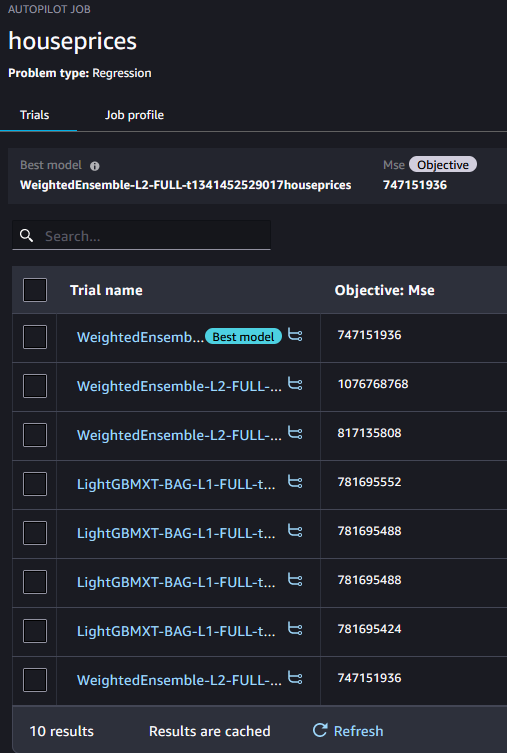
The job took 20 minutes to run. When finished you can select the Autopilot job and see the different models it built and the different results:
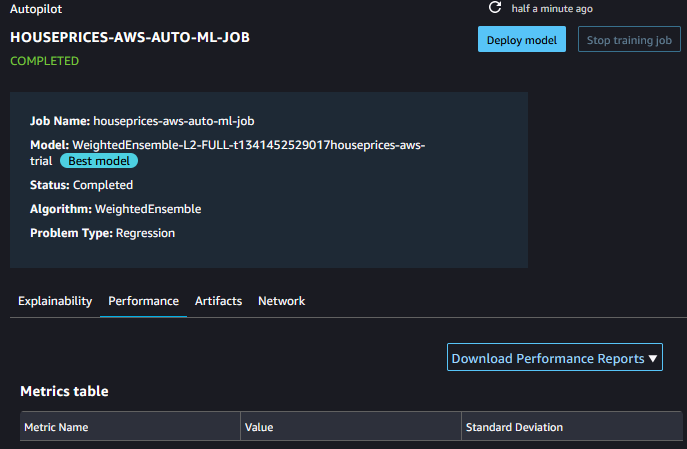
If you select the best model then under the performance tab is the option to Download a report:
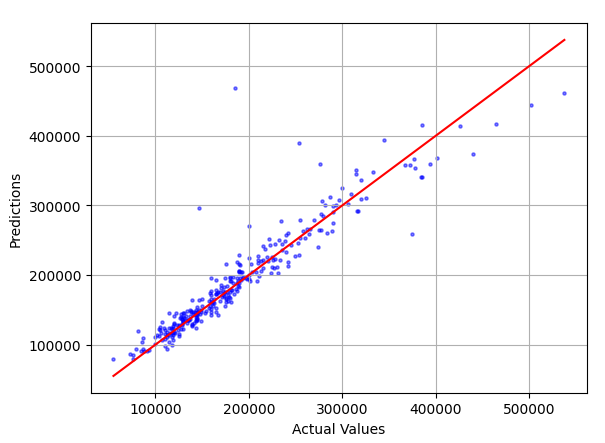
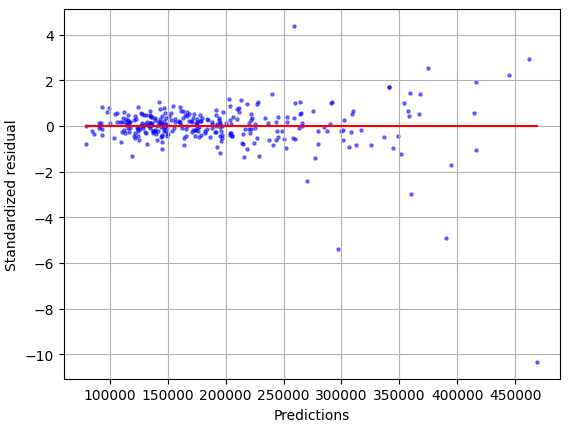
This report shows actuals vs predicted:
Plus residuals:
The model chosen for me is one that is an Weighted Ensemble of XGB, GBM, CAT, FASTAI, NN_TORCH, LR, RF, XT model types.
Validation
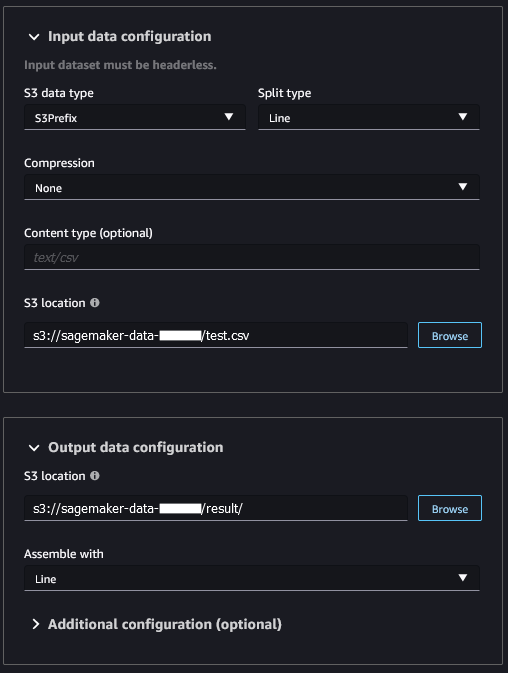
To validate the results, then we need to use the model to predict the house price for the test dataset. This is what Kaggle will score on. This can be uploaded to the same bucket as before, but first the header line needs removing as AWS has this as a requirement.
Once the model is selected to be deployed then two options are available:
- Make real-time predictions
- Make batch predictions
For this scenario we need to perform a batch prediction, configured like so:
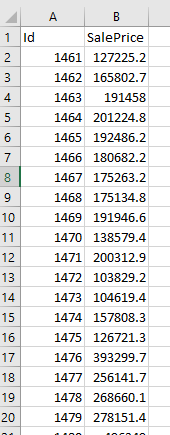
Once complete (takes a few mins) then the file is pushed to S3 and it can be downloaded to show the list of predictions. Before uploading to Kaggle, it needs the ID column adding and the header row adding to match the Kaggle Sample Submission:
And then voila! The results are in and it turns out Autopilot beat my score, impressive considering it took 5 mins of my time and 20 mins of its time to do:
I would certainly consider using Autopilot in the future, especially as a starting point at the very least - plus it provides a data exploration notebook which can be used to explore the input data and help in the Data Science aspect.
Hopefully this gives you an idea of a powerful capability of SageMaker, and I urge you to give it a try.